CoreOS Setup with the Davra Cloud Config in VMware Workstation
Prerequisites
To follow the below instructions you will need to have VMWare Workstation installed and at least 50 GB free space on your disk.
Note: The steps to set up CoreOS in vSphere / ESXi are very similar to Workstation.
Instructions
- Download the CoreOS OVA file and the Appliance Cloud Config ISO file from our Downloads page: Downloads
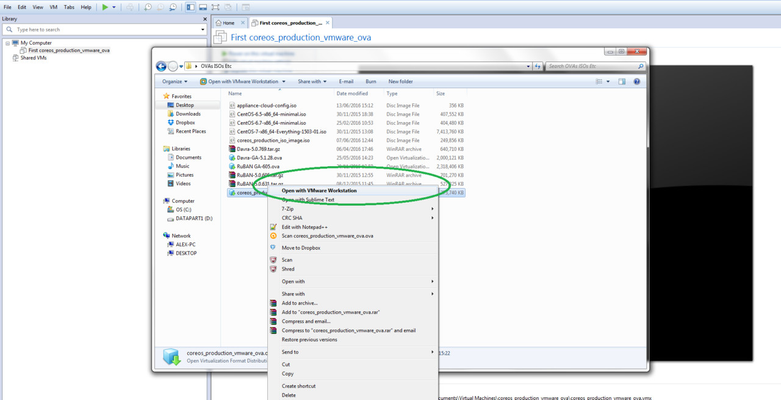
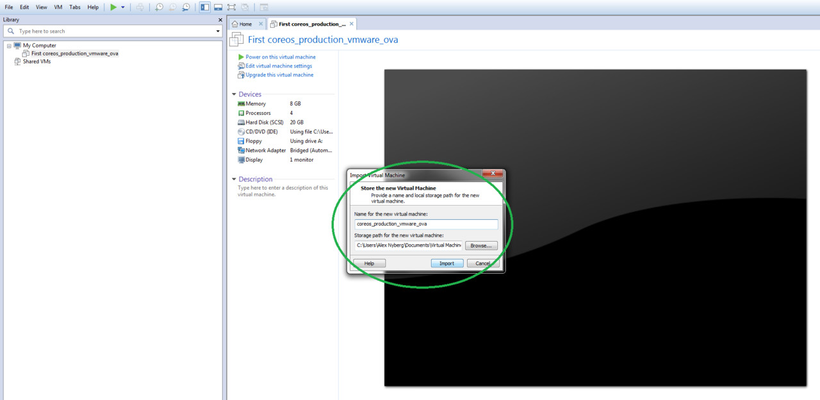
- Import OVA to VMware Workstation.
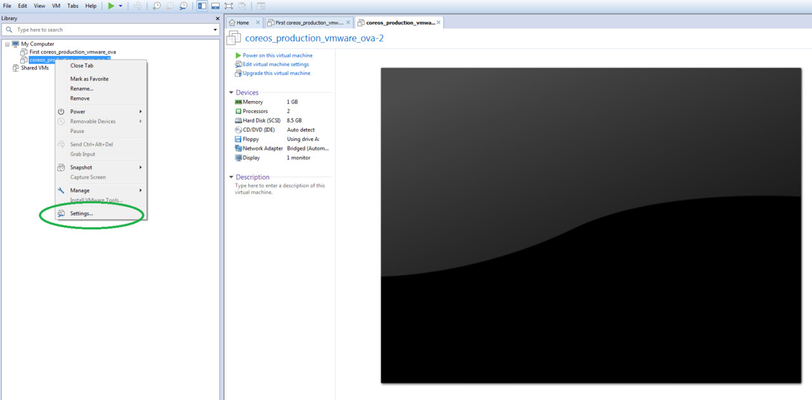
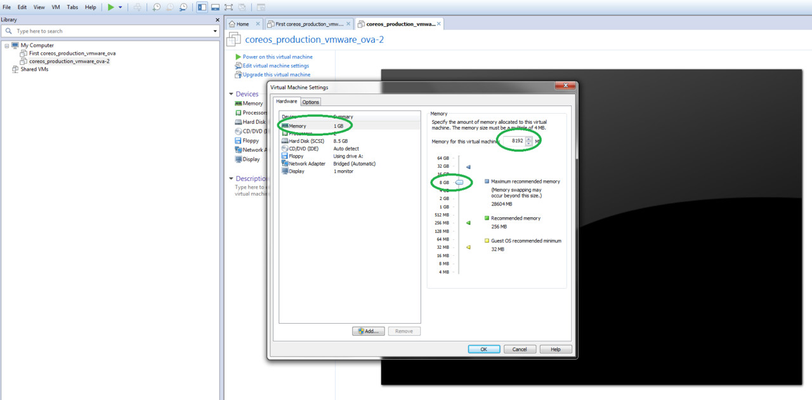
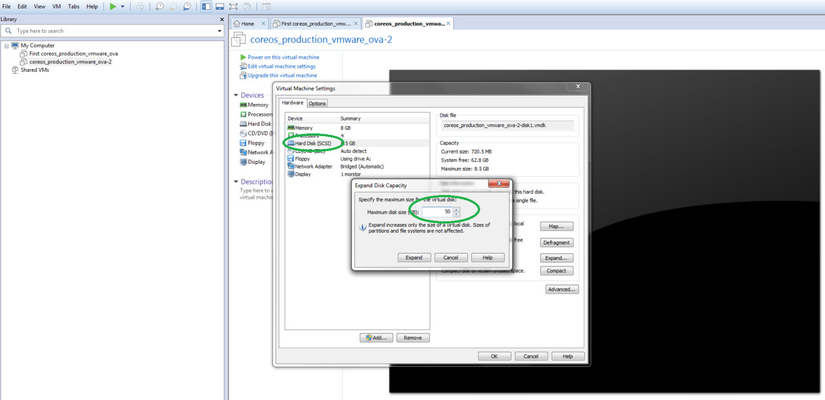
- Right-click on Settings and configure the following:
- 32 GB memory
- 16 CPU Cores
- 250 GB disk (or more for production deployment, and always thick provisioning).
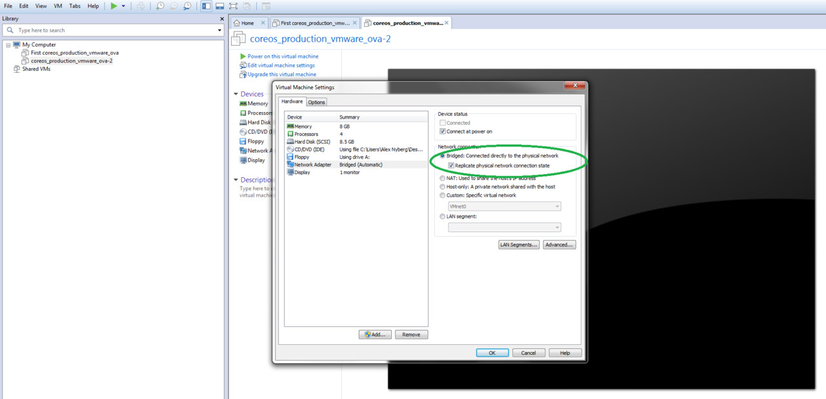
- Configure network settings as required
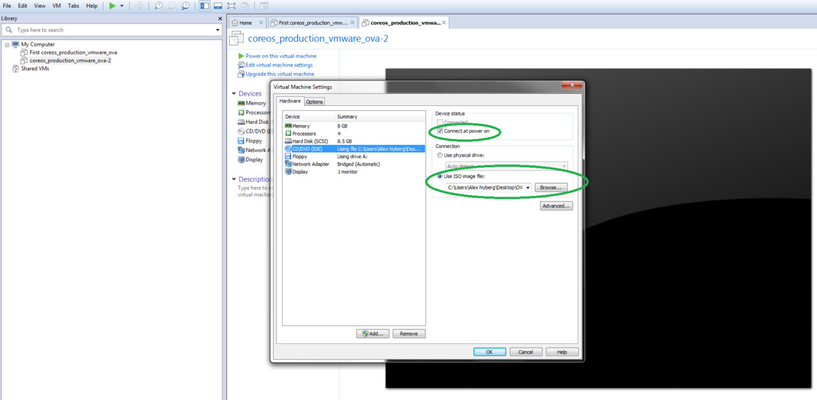
- Mount the appliance-cloud-config.iso file and select Connect at power on. (NOTE: In ESXi you will need to upload the config ISO file to the "data store" to mount it at boot).
4. Boot the machine and logon as user davra, password davra. If you are not prompted to login as "davra" you have probably not mounted the above ISO file.
5. Run df -h to see whether you have sufficient space on sda9. If there's less than 20 GB free space on sda9, follow the instructions to extend the disk space: How to Extend the Disk Space in CoreOS
The last step is normally not required if you followed above instructions properly.
You may also want to update your network settings to use static IP: How to change CoreOS network interface from DHCP to static
When you have confirmed that your network settings work we recommend updating the date and time by running the following command: sudo systemctl status systemd-timesyncd ntpd
Basically Same Steps as Above Displayed as Screenshots: